Clash of Critters Tier List
Do not ask only who is strongest. Ask who solves your next problem.
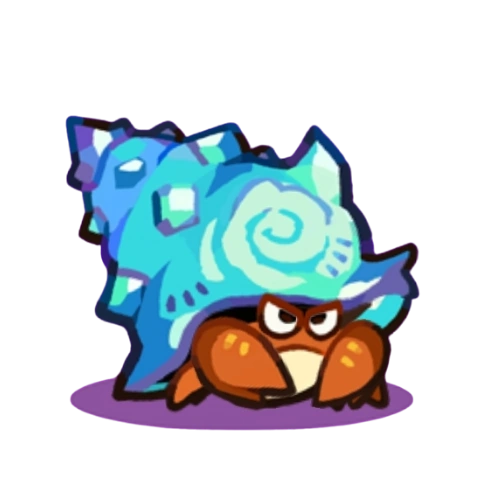
A community video-derived ranking split by T1, T2, T3/Horde, and buff/tech value, using only Tatari names that can be confirmed in the database.
Quick Answer
Last checked June 7, 2026. This is an unofficial community/video-derived list, not a developer balance chart.
This update follows the provided creator transcript and tier image: T1 is mostly about fast progression and high-star stopgaps, T2 is where skills start mattering, and T3/Horde rewards healing, buffs, setup value, and flexible front/back row planning.
Only confirmed Tatari names are included. Unmapped transcript/image names such as Tityan/Bubbadeath, Dune Beetle, Mantis, and Kijitsu/Tiglow are kept out of the formal list until their database slugs can be verified.
T1 Early Practical Picks
Early-form picks from the creator tier notes: useful for fast campaign progress, role coverage, and high-star low-rarity stopgaps.
 ZapupBlueTank
Starter frontline value; teaches lane stability before rarer units are realistic. Confidence: high
 CluckyBlueDPS
Starter DPS value; good early reference point for damage and element coverage. Confidence: high
 ShellshyBlueTank
Accessible Water frontline option for accounts that need a first-contact answer. Confidence: medium
 SparkrowBlueDPS
Simple Fire DPS coverage while the account is still building its first stable team. Confidence: medium
 RockhogBlueDPS
Low-rarity Rock damage can carry a lane when higher-rarity units lack stars. Confidence: medium
 SnoozeboBlueTank
Useful temporary tanking profile; video notes call out low-rarity high-star units as real stopgaps. Confidence: medium
 CapywataBlueDPS
Water DPS filler when the account needs a second element more than rarity. Confidence: medium
 MudrumpBlueDPS
Early Rock coverage, best treated as a gap filler until stronger lines mature. Confidence: medium
 BoldclawBlueTank
Good enough frontline upgrade, but do not over-invest before the team shape is clear. Confidence: medium
T2 Skill Spike Picks
Mid-evolution picks that start showing real skills, better lane roles, and practical stage-pushing value.
 CheerlingUnknownSupport
Creator notes describe the Cheer support line as a staple once T2 support value appears. Confidence: medium
 BlitzmanePurpleGuardian
Reliable Lightning Guardian/frontline value during the T2 push window. Confidence: medium
 ZapantlerPurpleDPS
Lightning DPS option the transcript calls out as a later-discovered useful pick. Confidence: medium
 CobbledonPurpleTank
Decent tanking during T2, though the transcript says it may not hold as hard as desired. Confidence: medium
 FirecoilUnknownTank
Frontline Fire utility and later buff value make the line worth tracking. Confidence: medium
 SealoonPurpleDPS
Water damage with Weak-style utility was useful enough to be tested in T2 teams. Confidence: medium
 FrostpawPurpleDPS
Solid Water DPS in the transcript, but still roster-dependent. Confidence: medium
 IgnisnapPurpleDPS
Fire DPS option that can fill damage slots when stronger pieces are missing. Confidence: medium
 WaveflutterUnknownDPS
Held lower at T2 because the later bubble/circle value is not fully online yet. Confidence: medium
T3 / Horde Utility Picks
Late-form and mode-focused picks for Horde Invasion, longer fights, and flexible front/back row planning.
 CheerstellaUnknownSupport
High-value support endpoint for attack/defense boosting and long-fight stability. Confidence: medium
WaveflutterUnknownDPSTranscript says this line starts shining at T3 when its extra setup value appears. Confidence: medium
 SunfleurUnknownHealer
Healer/buff value fits the multi-healer Horde cores described in the video notes. Confidence: medium
 ToucanzamPurpleTank
Common Horde/meta-style pick called out as a frequent player choice. Confidence: medium
 PandarriorUnknownDPS
Panda line appears in the transcript as a common Horde pairing with Toucan-style utility. Confidence: medium
 ElectroarPurpleGuardian
Lightning Guardian fallback for frontline stability when preferred Horde choices do not line up. Confidence: medium
ZapantlerPurpleDPSUseful back-row or flex damage option depending on partner picks and mode needs. Confidence: medium
 VoltmareRedDPS
Transcript notes it can perform decently as a flexible Lightning damage pick. Confidence: low
 PyrodaemonPurpleGuardian
Fire Guardian/control value matters, but needs enough investment to justify the slot. Confidence: medium
Buff & Tech Picks
Situational picks for buff stacking, Dojo pressure, lane control, Gold Mine Rush, and mode-specific problem solving.
 CheerletUnknownSupport
Cheer support line can provide stackable attack/defense-style buffs by skill naming. Confidence: medium
 AshlarvaUnknownTank
Firecoil/Ashlarva line is called out for Flutter attack boost value. Confidence: medium
 SulfunkUnknownDPS
Transcript points to AoE gas-style damage that can pair with Waveflutter setups. Confidence: medium
 ArmorjawUnknownTank
Lane-push control can buy time and keep enemies where other Tatari can act. Confidence: medium
 BorelordUnknownSpecialist
Specialist displacement/control value is useful when enemy positioning is the real problem. Confidence: medium
 VoltazarUnknownGuardian
Mentioned as a useful charge/supercharge-style buff candidate. Confidence: low
 KittazapUnknownGuardian
Same family of Lightning tech value as Voltazar, but public detail remains thin. Confidence: low
 MagmuskUnknownDPS
AoE/status-style utility may matter in stacked lanes, especially with setup partners. Confidence: medium
 PyropupPurpleGuardian
Gold Mine Rush note points to Weak/frontline utility later in the Fire Guardian line. Confidence: medium
How to Read This Tier List
Tier lists are decision shortcuts, not permanent truth.
Overall value does not mean beginner priority. T1 units can clear early content quickly, but many should stop being major projects once T2/T3 skills come online.
Use the database and team builder before spending rare evolution materials. Re-check after patch notes, new events, Gold Mine Rush pressure, or new code rewards.
Open Team Builder